- HubPages»
- Technology»
- Computers & Software»
- Computer Software
Enhance Color Saturation in Gimp


Enhance saturation is a great way to add a dramatic effect to your photograph. Here, I' ll show you how to saturate your photo with two main steps: first, adjusting contrast & brightness. And then, adding saturation with the help of layer masking.

Adjusting Contrast & Brightness
There are two great ways to adjust the contrast and the brightness of your photo: Curves and Levels. To adjust color with curves, click Colors > Curves. Then drag line as you need.
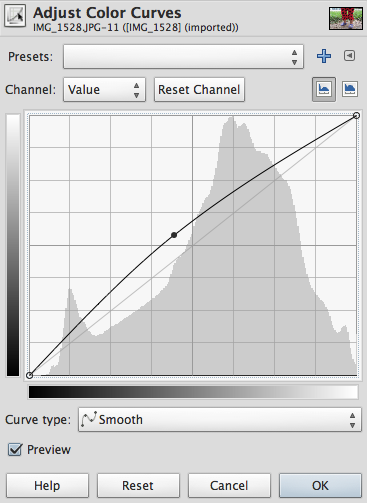

If you don't satisfy with the result, you can try the Levels on Colors > Levels.
Adding Color Saturation
Go to Colors > Hue-Saturation. Drag the Saturation to the right side as you need.
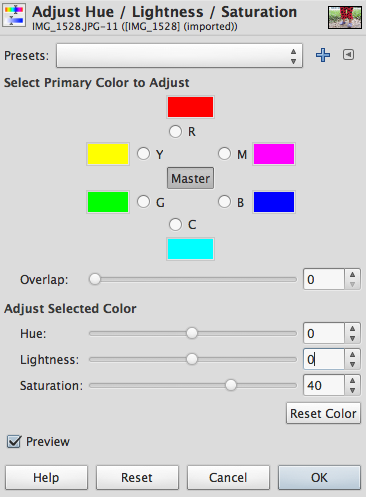
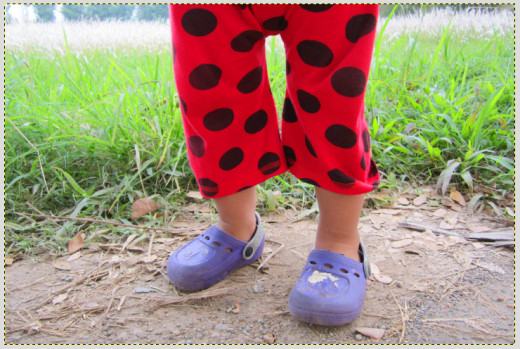
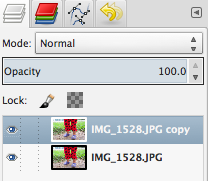
I only satisfy with the results of the skins and grass' color. I need more saturation degree for other objects. So, I need a new layer with the same image but different saturation on the different areas. How to do it? First, duplicate the layer by clicking Layer > Duplicate Layer. You'll see the two same layers in the layer box.
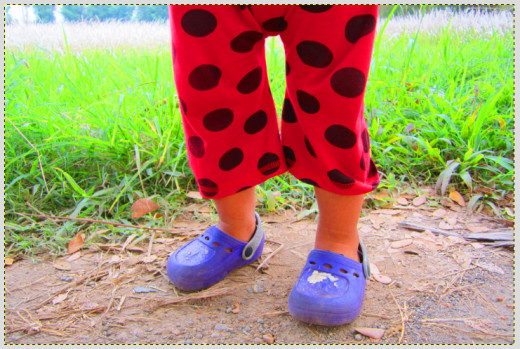
Enhance the saturation again via Colors > Hue-Saturation. Again, drag the Saturation to the right side. Don't worry if the skins and grass' color is over saturated. Here, I want to enhance the saturation of all of the areas except those two areas: skins and grass. Because, I will apply layer mask to simply make specific areas (grass) in the current layer is transparent, so the same areas in the below layer is visible.

Applying Layer Mask
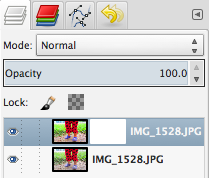
Go to Layer > Mask > Add Layer Mask or by simply right clicking the layer > Add Layer Mask. If layer mask filled with white, it means the layer mask will make all of the layer fully opaque. Black means the layer mask will make all of the layer fully transparent. And grey means semi transparent.
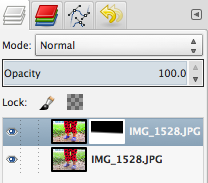
Here, I want to show grass from the below layer smoothly. So, I use Blend tool to create transparency. Choose Linear with black to white color. Click and drag vertically at the meeting between the soil and grass.
Then, using Free Select Tool, select the pant, feather the selection to blurs the transition between the selection and surrounding pixels and fill it with white color. Use the same way to select the grass in the center, but fill it with black color to transparent it.


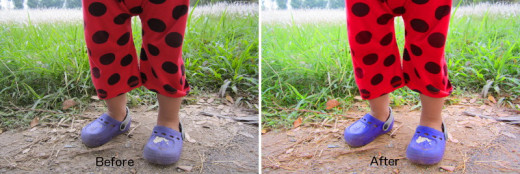
Final Look
The photo below shows you before and after retouching.